QUnit, PhantomJS and Mockjax
Following on from last week's introduction to QUnit today I want to talk less about how to use QUnit but ways to make it easier to use or integrate it into your development workflow.
A lot of people asked me how to avoid refreshing the QUnit tests page everytime you want to rerun the tests. I was actually using the Mac tool LiveReload which is currently on the App Store for £6.99. Fear not Windows users, it's coming to Windows too, and is currently in early testing stages, with users able to download & test it now, for free. You assign LiveReload a folder to watch and install the browser plugin. Once you've connected the browser to the app, when the app detects a file has changed it will refresh the browsers. This meant whenever I saved my source file, or my tests file, it would rerun the tests. It's a lovely solution & I would highly recommend it.
Now, being a developer something I immediately wondered was if I could run tests in the terminal. My answer came in the form of PhantomJS. There's a number of ways to install PhantomJS, the easiest if you're on a Mac and use homebrew is to simply run brew install phantomjs. It can be installed on Linux, OS X and Windows. Once you've got that done, you need to get the QUnit JS runner for Phantom, which can be found here on Github. Save that into the root directory. You should then be able to run your tests in the command line by:
phantomjs run-qunit.js path/to/tests.html
In my case, I run the tests through a virtual host and you can see that right now it's failing:
phantomjs run-qunit.js http://instagram.jsp/tests.html 'waitFor()' finished in 401ms. Tests completed in 266 milliseconds. 6 tests of 7 passed, 1 failed.
Why is it failing? Unfortunately you don't get shown the failing tests in the output, which is a shame, however it's nice for a quick test, as in reality you only need to know about a test if it fails. We can head over to the browser and see:

So, it seems Instagram changed the URL where this image is stored that we get from our Ajax call. This is what I want to talk about now. When testing, you can't rely on making actual external Ajax calls. Why not? Imagine that you're on a train, and fancy developing. Without internet, you're stuck when it comes to testing. You also, as we've seen above, can't rely on certain values staying the same so you can test against them. Here you can see a test that worked fine last time round doesn't anymore, all because the URL changed. Our code hasn't, at all. What we need is a way to fake Ajax calls & returned data.
Enter jQuery Mockjax. So, lets mock up a response for the current Ajax call we're making. What I'm going to do is make the API call & copy the data. We can define a new Mocked Ajax call like so (taken from the docs on the Github page):
$.mockjax({ url: '/restful/fortune', responseTime: 750, responseText: { status: 'success', fortune: 'Are you a turtle?' } });
Mockjax will then capture all Ajax requests to /restful/fortune and return the data within responseText. You can also define responseTime to simulate latency. As our response is a fair few lines, I'm actually going to save this in tests/oembed.json and then we'll tell Mockjax to use it shortly. So your tests/oembed.json should look like this:
{ provider_url: "http://instagram.com/", media_id: "168887029519565501_138023", title: "Drainpipe", url: "http://distilleryimage5.s3.amazonaws.com/9436051c85b011e18cf91231380fd29b_7.jpg", author_name: "joel_hughes", height: 612, width: 612, version: "1.0", author_url: "http://instagram.com/", author_id: 138023, type: "photo", provider_name: "Instagram" }
Now lets mock our Ajax call. Within the asyncTest call we created last time, at the top, add in this:
$.mockjax({ url: 'http://api.instagram.com/oembed?url=http://instagr.am/p/JYAdvJr0K9/', contentType: 'text/json', proxy: '/test/oembed.json' });
The url property tells Mockjax to capture any Ajax calls to that URL. We then tell it that the response will be JSON, and then use the proxy pattern to define a response file. That means Mockjax will just send the contents of that file back to the app.
Before we run this, make sure you've downloaded the Mockjax source from Github and have included it in your tests.html file, before you include our QUnit tests. Now, if you run it, you'll still get the error in the test. This is expected because we haven't changed the URL to be the new URL Instagram now gives us. If you want to check it's working, head to your console. Mockjax logs to the console everytime it captures a request, which is a nice way to test. In my case I see this line:
MOCK GET: http://api.instagram.com/oembed?url=http://instagr.am/p/JYAdvJr0K9/
So I can be confident it works. Now head into the oembed.json file and copy the url property into our equal() call, so it now looks like this:
equal(res.url, "http://distilleryimage5.s3.amazonaws.com/9436051c85b011e18cf91231380fd29b_7.jpg", "URL returned is correct");
If you run the tests in the command line, you will see the Mockjax log & that all our tests pass:
phantomjs run-qunit.js http://instagram.jsp/tests.html MOCK GET: http://api.instagram.com/oembed?url=http://instagr.am/p/JYAdvJr0K9/ 'waitFor()' finished in 701ms. Tests completed in 509 milliseconds. 7 tests of 7 passed, 0 failed.
And if you want to double check, you can load up the tests in your browser and see:
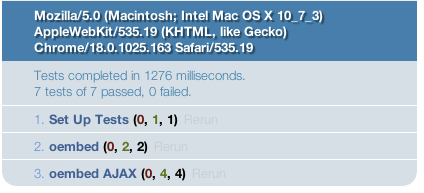 .
.
So, although we didn't write any more functionality in this post, we've now got Mockjax set up so we can work on it much easier and not rely on a 3rd party service or having an internet connection when we want to do some testing. I highly recommend using Mockjax for all your Ajax queries.
Files for this tutorial can be found on the tutorial2 branch of the repository.
If you want to explore running JS tests in the command line further, I recommend the JS tool Grunt, which I wrote a tutorial on yesterday, so please do check that out.
As always, any questions, please leave a comment & I'll get back to you!